Just like Android, Windows 10 has apps for every different purpose. On Techviral, we have already shared many articles on Windows 10 best software like the best Photo editing application, best customization tools for Windows 10, etc. Sometimes, we install more programs than we need, and later we forget about it. Although you can get a list of all installed programs from the Control Panel, what if you want to share your install program list with anyone? There could be various reasons why you would want to share a list of all installed programs with others. For example, maybe you want to suggest your software or share the list with a security researcher to find the hidden malware.
2 Methods to Generate a List of All Software Installed on a PC
Whatever could be the reason, Windows 10 allows you to generate a list of all installed software in just a few clicks. So, in this article, we will share the two best methods to get a list of all software installed on your computer. Let’s check out.
1. Using Command Prompt
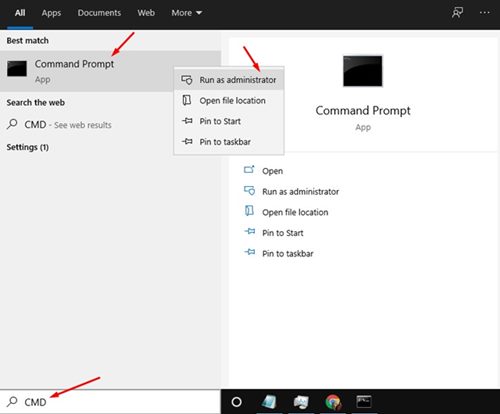
In this method, we will use the Command Prompt utility to get a list of all installed software on a system. Follow some of the simple steps given below. Step 1. First of all, open Windows search and type in CMD. Right-click on the Command Prompt, and select ‘Run as Administrator.’
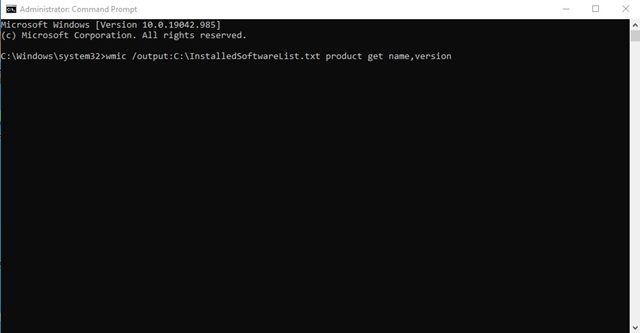
Step 2. This will open the Command Prompt Window, type in the below command, and hit the Enter button – wmic /output:C:\InstalledSoftwareList.txt product get name,version
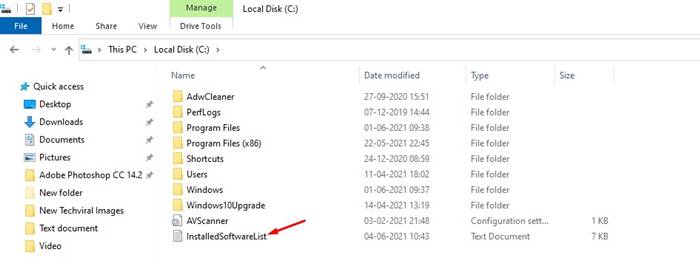
Step 3. Once done, head to the C: Drive and find the text file named ‘InstalledSoftwareList’. The list will have the name of all installed software.
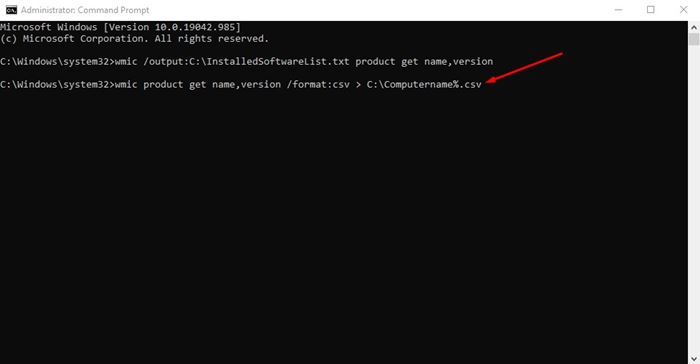
Step 4. To generate a CSV file for the same, enter the command – wmic product get name,version /format:csv > C:\Computername%.csv
That’s it! You are done. This is how you can generate a list of all software via Command Prompt.
2. Using PowerShell
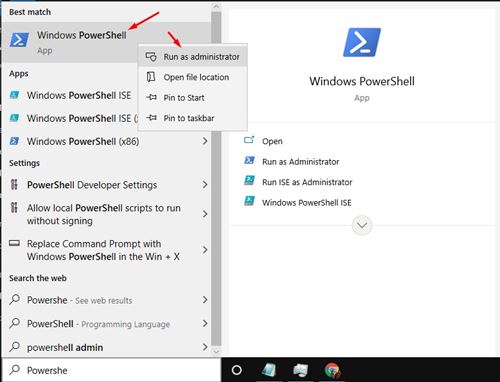
Like the Command Prompt, you can utilize Windows PowerShell to generate a list of all installed software on your PC. For that, follow some of the simple steps given below. Step 1. First of all, open Windows search and type in ‘PowerShell‘. Right-click on the PowerShell, and select ‘Run as Administrator’
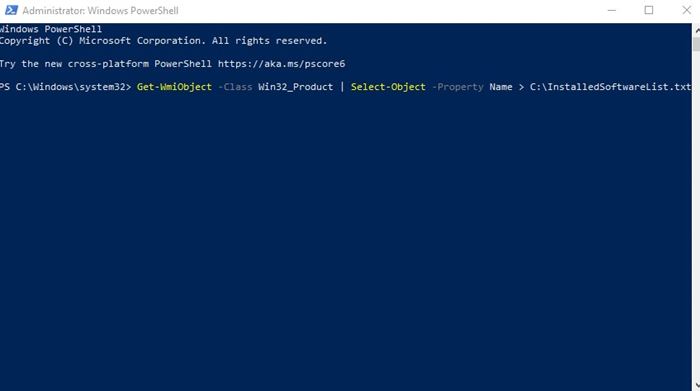
Step 2. On the PowerShell Window, copy and paste the command given below and press the Enter button. Get-WmiObject -Class Win32_Product | Select-Object -Property Name > C:\InstalledSoftwareList.txt
Step 3. If you don’t see any text file on the C: Drive, then execute the below command on Windows PowerShell. Get-ItemProperty HKLM:\Software\Wow6432Node\Microsoft\Windows\CurrentVersion\Uninstall* | Select-Object DisplayName, DisplayVersion, Publisher, InstallDate | Format-Table –AutoSize > C:\InstalledSoftwareList.txt That’s it! You are done. This is how you can use Windows PowerShell to generate a list of all installed software on Windows 10. So, this guide is all about generating a list of all programs installed on Windows 10. I hope this article helped you! Please share it with your friends also. If you have any doubts related to this, let us know in the comment box below.
Δ